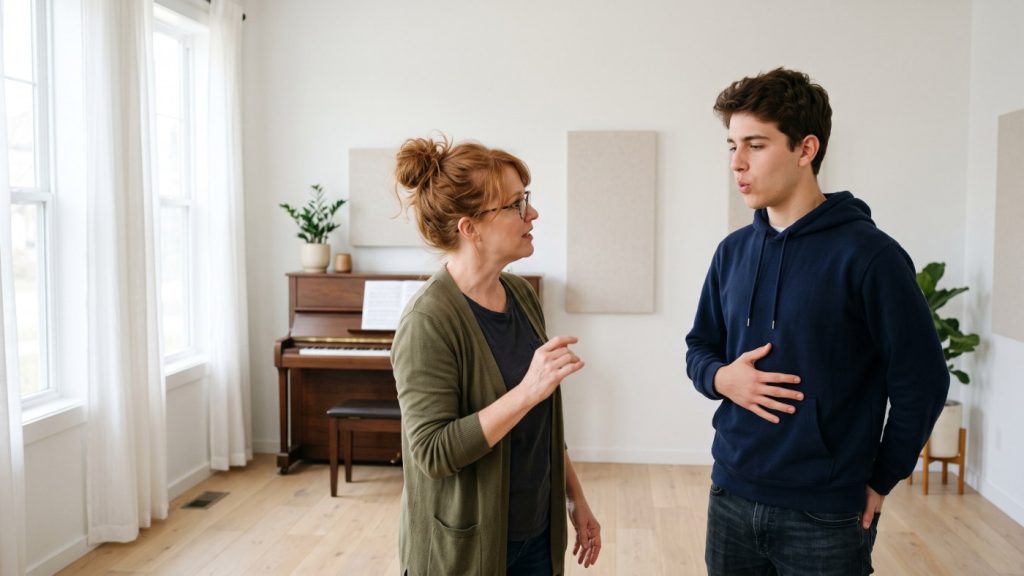
Picture a sprinter rolling out of bed and straight into a 100-metre race. No coach would allow it, yet most singers do exactly that with their voice: they walk into rehearsal, an audition or a recording session and open with the hardest song on the list. Ten minutes later the voice feels sticky, the top notes wobble, and by the end of the night the throat is tired. Often, the fix is ten minutes of the right warm-up.
This is a guide to warming up and cooling down your voice – not a random list of “exercises I found online”, but an ordered routine with a clear logic: what each step does, how long it takes, and how to adapt it to your day. We wrote it for the singers we meet in our singing lessons in North Tel Aviv – high-schoolers from Neve Avivim and Ramat Aviv Gimel preparing for their music matriculation exam, students from North and South Afeka who sing in bands, and adults from Tzukei Aviv and Kokhav HaTzafon getting back to singing after years away.
What a vocal warm-up actually does
Your voice is a three-part system that has to work as one: a power source (your breath), a sound source (the vocal folds in your larynx) and a resonator (the throat, mouth and nose, which shape the sound). A good warm-up doesn’t “heat up your cords” like an engine. It does several subtler things:
- It wakes up coordination. The small laryngeal muscles that control pitch and fold thickness need to cooperate with your breath. A warm-up rehearses the movements you’re about to ask of them.
- It clears unnecessary tension. Jaw, tongue, neck and shoulders tend to arrive carrying the stress of the day. Warming up lets you notice it and release it before it gets into the sound.
- It moves gradually from light to heavy. You start with low-load exercises and finish at the range and volume of your actual songs.
- It gives you information. After five minutes you know how your voice feels today – fresh, tired or a bit under the weather – and can plan accordingly.
Honestly, research on warm-ups is still limited. What voice teachers, speech-language pathologists and voice doctors broadly agree on is that a gradual, gentle warm-up helps singers feel more control and comfort, and is very unlikely to do harm if you don’t overdo it.
A 10-minute warm-up routine, step by step
This is the core routine. Do it at home, in the car on the way to rehearsal (minus the body step) or backstage. The order matters more than the exact exercises.
Step 1: Body and posture (90 seconds)
- Roll your shoulders back five times, then let them drop.
- Tilt your head gently from side to side – no full neck circles.
- Massage your jaw muscles (the masseters) with your fingertips, then open and close your mouth slowly a few times.
- Stand with your weight even on both feet, knees unlocked, chest open but not puffed up.
Step 2: Breath (90 seconds)
Breathe in quietly through your nose and let your belly, lower ribs and lower back expand. Breathe out on a long, even “sss” for 8 beats at 60 BPM. Add two beats each round, up to 16. The goal is a steady flow, not “as much air as possible”. If you want to go deeper, our guide to breath support for singers covers the whole foundation.
Step 3: SOVT exercises (3 minutes)
SOVT stands for semi-occluded vocal tract: exercises where the mouth is partly closed – lip trills, straw phonation, humming. The back-pressure from the lips helps the vocal folds vibrate efficiently with less collision, which makes this the safest way to “switch on” the voice.
- Lip trills on a five-note scale up and down, at speaking volume. Move up a semitone each round, six to eight times.
- Straw: slow sirens from your lowest comfortable note to a high one and back. If you have a glass of water, put the straw about 2–3 cm under the surface and keep the bubbles even.
Step 4: Humming and resonance (90 seconds)
Hum “mmm” at a comfortable speaking pitch, lips closed and teeth apart. Look for a light buzz in your lips and nose. Then open the hum into a vowel – “mmm-ah”, “mmm-oh” – and try to keep the same easy sensation on the open vowel. We’ve written a whole guide on this side of the voice: vocal resonance and tone.
Step 5: Glides and range (2 minutes)
Glide on “oo” or “ee” from a comfortable note up an octave and back, slowly, without skipping over your break. If the voice cracks, that’s fine – that’s precisely where the practice happens. Finish with a downward glide on a soft “hoo”, like a sigh. This is also a good moment to check your accuracy: a glide that lands exactly on a note played on the piano tunes your ear, as we explain in how to sing in tune.
Step 6: Diction and into the song (90 seconds)
A few quick patterns on one note (“lee-lah-loo”, “bah-dah-gah”), then sing the first verse of the song you’re about to perform once – at half volume. Only then move on to the chorus and the high notes.
How long should you warm up? A practical table
There’s no single “right” length. In the morning your voice is usually lower and heavier; after a day of talking it may be tired; before a show you’re short on time. Here’s how to adapt:
| Situation | Length | Focus |
|---|---|---|
| Daily practice at home | 8–10 min | All six steps at a relaxed pace |
| Morning singing (exam, early session) | 15–20 min | More time on SOVT and glides; start low and climb gradually |
| Before band rehearsal | 10–12 min | Range and volume of the set; check the top notes in the hardest songs |
| Before a gig, short on time | 5 min | Straw or lip trills, humming, and the hardest phrase once at half volume |
| After a mild cold (no pain) | 5–8 gentle min | Low-volume SOVT only; if there’s pain or hoarseness, don’t sing |
At band rehearsal, with drums and guitars already loud, it’s tempting to skip the warm-up. That’s exactly when it matters most, because singers in a loud room tend to push. Students in our band and ensemble programme learn to fit in five minutes of straw work before the amps are switched on.
The cool-down: what to do after singing
Few singers know about cooling down. After a night of loud singing, the voice tends to stay “up” – your speaking voice sits higher and tighter, and your throat feels tired. A short cool-down brings it back to a normal speaking balance. Research here is still developing too, but it’s a gentle, free and virtually risk-free habit that many teachers recommend.
- Descending straw or lip trills – top-to-bottom glides only, at low volume, one or two minutes.
- The “mm-hm” of agreement – the sound you make when you agree with someone, at your natural speaking pitch. It helps you find your speaking “home” again.
- Yawn-sigh – breathe in as if starting a yawn, then let out a soft, falling sigh on “hah”.
- Water and rest – room-temperature water, and don’t head straight into a shouted conversation at a bar. Whispering is not “rest”; for many people it’s actually effortful. If you need to talk, speak quietly in your normal voice.
A weekly plan: turning it into a habit
A warm-up only works if it’s consistent. Here’s a week for singers practising 20–30 minutes a day:
| Day | Warm-up | Practice | Cool-down |
|---|---|---|---|
| Sun | 10 min core routine | One song, broken into phrases | 3 min |
| Mon | 10 min, straw focus | Range: glides through your break | 3 min |
| Tue | 10 min, diction focus | Lyrics and text, slow singing | 3 min |
| Wed | 12 min, pre-rehearsal style | Whole set at half volume | 5 min |
| Thu | 10 min | Record on your phone and listen back | 3 min |
| Fri–Sat | 5 min or rest | Sing for fun, no pressure | As needed |
After two or three weeks the warm-up usually shortens by itself, as the voice “arrives” faster. That’s also when a teacher can tailor the routine to you. In our voice lessons for teens and adults, the teacher hears whether your glide always catches on the same note, whether your jaw locks during lip trills, or whether your breath creeps up into your chest – and swaps one exercise for another that suits your voice better.
Common mistakes
- Opening with high notes at full volume. That’s the opposite of a warm-up. Always light to heavy, and low-to-mid before high.
- A 40-minute warm-up before a gig. Too long is tiring. If you’re already tired before you walk on stage, cut it down.
- Constant throat-clearing. Hard clearing slaps the vocal folds together. Instead: a sip of water, a swallow, or a quiet hum.
- Warming up the voice but not the body. A locked jaw and raised shoulders will walk straight into the song.
- Singing through pain. A warm-up doesn’t fix a sick voice. Pain, burning or hoarseness mean stop, not warm up harder.
- Copying another singer’s routine exactly. A good routine is built around your voice and your songs.
When a warm-up isn’t enough: signs to see a doctor
If you find you need a longer and longer warm-up before your voice “wakes up”, or your voice tires quickly even after a good warm-up, it’s worth getting checked. See an ENT (ideally one who works with singers and can scope your vocal folds) if you have hoarseness lasting more than two weeks, pain when singing, loss of high, quiet notes, or a constant need to clear your throat. A speech-language pathologist who specialises in voice is an excellent partner for rehab and healthy habits. A voice teacher is never a substitute for a medical diagnosis.
Warming up in North Tel Aviv: how we teach it at Rockstar
At Rockstar – the music school in Ramat Aviv Gimel – every singing lesson starts with a warm-up, and after a few lessons each student leaves with a personal routine: what to do on the morning of an exam, before rehearsal, and in the car on the way to a gig. The exercises in this guide are the foundation, but the goal is always real songs – for the matriculation exam, the end-of-year concert, your band or just for fun. And if you’re getting ready for the stage, you’ll find more tools in our guide to preparing for a live performance.
FAQ
Can I warm up without disturbing the neighbours?
Yes. Most of the routine – straw, humming, lip trills at speaking volume – is very quiet. Straw singing into a glass of water is about as quiet as it gets, and still highly effective.
How long before a performance should I warm up?
Aim to finish your main warm-up within roughly half an hour to an hour before you go on, and keep a minute or two of straw work or humming for right before. If a lot of time passes between warm-up and show, briefly repeat the light steps.
Do I need to warm up for quiet singing, like a recording?
Yes – maybe even more. Quiet, clean singing needs very fine control, especially on a microphone that picks up every noise and breath. On a recording morning, use the long version of the routine.
Do you offer singing lessons near Neve Avivim, Afeka or Tzukei Aviv?
Lessons take place at the Rockstar music school in Ramat Aviv Gimel, a short drive from Neve Avivim, North and South Afeka, Tzukei Aviv and Kokhav HaTzafon. If you’d rather learn at home, ask about Rockstar Home lessons – subject to teacher availability in your area. You can start with a free intro singing lesson, and read more about the area on our page about music lessons in Neve Avivim.
Read also: Mic Technique for Singers · How to Sing with Vibrato · Vocal Tips: How to Protect Your Voice
Vocal lessons · All lessons · Contact us · Book a free intro lesson