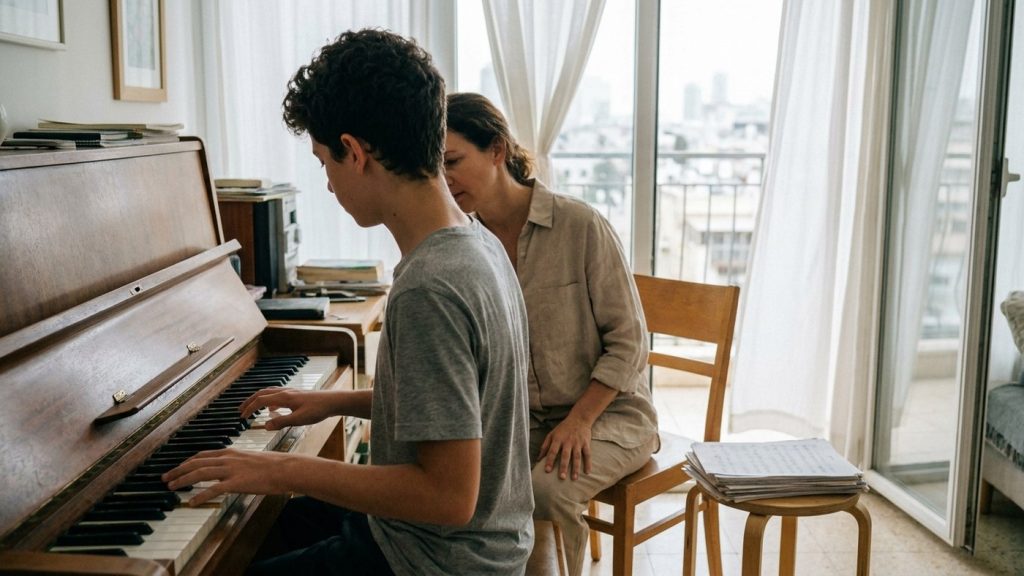
Almost every new pianist hits the same wall. The right hand plays a lovely melody, the left hand plays a simple accompaniment, and the moment you put them together everything falls apart. Suddenly both hands do the same thing, or one waits for the other, or your brain just stops. That is not a lack of talent. Piano hand independence is a learnable skill, and it has a clear order of work.
This guide is for piano students in North Tel Aviv of any age: teenagers from Neve Avivim and North Afeka learning the songs they love, students from Green Ramat Aviv, and adults from Azorei Chen coming back to the keys after years away. If you live in Neve Avivim, all the details are on our page about music lessons near Neve Avivim. In our piano lessons in North Tel Aviv we start working on hand coordination in the first weeks, because you cannot accompany a song without it, and once you have it, everything opens up.
Why your two hands refuse to cooperate
The brain likes to copy a movement from one hand to the other. That makes sense: most of daily life uses both hands in a similar way. At the piano each hand has a different job: one carries the melody, the other holds a steady accompaniment or a bass line. When your attention locks onto one hand, the other either goes on autopilot or freezes.
The fix is not more effort. It is breaking the task into layers. Build each hand alone until it is nearly automatic, join them at a very slow tempo, and raise the speed only when the joined version is clean. The guiding rule: if you cannot play it slowly, you will not be able to play it fast.
Step 0: prepare the ground
Before the exercises, three things that save a lot of frustration:
- Posture. Elbows roughly at keyboard height, shoulders loose, the bench not too far back. A tense hand does not practice, it just gets stuck.
- A metronome. Practicing without a steady pulse builds combinations that only sound good in the living room. Use our free online metronome and start around 50 to 60 beats per minute.
- Enough reading fluency. If reading line after line is still hard, go through the 5 steps to reading sheet music first, because attention spent on decoding is not available for coordination.
A five-step practice plan
Each step fits a week or two, and you can stay in it as long as you need. With a teacher you get corrections in real time. Practicing alone, record yourself and listen back. That is also how piano lessons for teens and adults work at our school.
Step 1: each hand alone, almost by heart
Play the passage with the right hand until you can do it without staring at the page, then do the same with the left. The goal is to free up your attention. When one hand already “knows” the part, you have headspace left for the other.
Step 2: parallel motion, then contrary motion
Start with the simplest exercise: a C major scale with both hands together in parallel motion, both hands moving the same direction an octave apart. Then move to contrary motion: both thumbs on C, then the right hand goes up while the left goes down. Contrary motion feels odd at first, and it is exactly what your hands need to learn: to separate. If you want a refresher on the scales themselves, our guide to major scales and keys explains the formula.
Step 3: a different rhythm in each hand
This is the heart of it. Try this at 60 BPM: the left hand plays one note per beat (four beats per bar) while the right hand plays two notes per beat. Then reverse it. Then try one hand in triplets against the other in eighth notes (exercise D in the table). That one is advanced, and you may skip it for now.
| Exercise | Left hand | Right hand | Starting tempo |
|---|---|---|---|
| A | Quarter notes (one per beat) | Eighth notes (two per beat) | 60 BPM |
| B | Eighth notes | Quarter notes | 60 BPM |
| C | Half notes (one every two beats) | Quarter notes | 70 BPM |
| D | Eighth notes (two per beat) | Triplets (three per beat) | 50 BPM |
Step 4: steady accompaniment, free melody
Now it is music. Take the simple progression G – Em – C – D, which appears in countless songs, and play the three notes of each chord together in the left hand, once per bar. In the right hand, play a melody using notes of the G major scale, long or short, without losing the accompaniment. If you are not yet sure how the chords are built, our guide to piano chords shows how to build any chord from any note, including inversions.
Step 5: raise the speed, do not force it
Raise the metronome by 4 or 5 beats only after three clean repetitions in a row. If you make a mistake, go back to the previous tempo rather than trying to push through. Going back is part of the method, not a failure.
Three accompaniment patterns worth knowing
Once your hands are a little separate, the fun part begins: real accompaniment. Three patterns cover a huge amount of pop and rock, and they match exactly what the left hand needs to do:
- Full chord on beat one. Press the chord once at the start of the bar and let it ring. The simplest option, ideal for slow ballads.
- Broken chord (arpeggio). The chord notes are played one after another, for example low, middle, top, middle, in eighth notes. It gives a sense of flow without much effort.
- Alternating bass and chord. The left hand plays the bass note on one beat and the chord on the next, as in country and folk. It is a great exercise for rhythmic precision.
Start each pattern with one chord only, no melody, and add the right hand once it is steady. That way your brain never has to process two new things at once.
Songs that suit this practice
You do not need to wait for a “high enough level” to play real songs. Several well-known songs are built on exactly the principles you have been drilling: Let It Be by The Beatles and Imagine by John Lennon pair a steady chord accompaniment in the left hand with a simple melody in the right, and Someone Like You by Adele suits the broken-chord pattern very well. Choose a song you know thoroughly by ear. When the melody is already in your head, the right hand almost finds its own way and your attention stays free for the left.
One small tip: start with the first verse only. A whole song is a two-month goal, not a one-evening goal, and eight bars that sound good are worth more than three pages that fall apart halfway.
What 15 good minutes look like
Many students say they “practice”, but in practice they play what they already know. Coordination practice means working on what does not work yet. A simple structure that does the job:
- Two minutes of warm-up: a scale with both hands at a comfortable tempo.
- Five minutes on the hard spot: two bars only, each hand alone and then together, at a very slow tempo.
- Five minutes of extension: add a bar or two, or raise the metronome a few beats.
- Three minutes of music: play something you love, to remember why you started.
If you only have ten minutes, keep the structure and shorten each part. The habit matters more than the length. Teenagers who stick to a routine like this usually notice a change within a few weeks, and adults gain mostly confidence.
How we teach this at Rockstar
At our music school in Ramat Aviv Gimel, the teachers, who are active, working musicians, listen to the hands and not only to the result: is the shoulder tightening, is the thumb stuck, where exactly does attention drop. An adult student from Tzukei Aviv and a high school student from Kokhav HaTzafon get the same goal and the same method, but different exercises, based on the songs they want to play. That is why we do not hand everyone the same sheet. If you would like to start, you can book a free intro piano lesson with no commitment.
Common mistakes
- Starting with both hands together. This is the first thing that causes frustration. Each hand alone first.
- Practicing too fast. “Almost clean” at a high tempo gets locked into your body as “almost clean” for good.
- Stopping at every mistake. If you always stop and restart, you never learn to survive a slip. Once you play with others you cannot stop, as we discuss in how to prepare for a live performance.
- Watching your hands all the time. A glance is fine, but real progress comes when your eyes are on the page or on the people playing with you.
- One long session a week. Fifteen minutes a day beats ninety minutes on Friday.
- Ignoring the silence between notes. Hand coordination is also coordination of rests. Let each hand release.
A 4-week plan
| Week | What to practice | Daily time |
|---|---|---|
| 1 | C major scale in parallel and contrary motion, 50 to 60 BPM | 10 to 15 minutes |
| 2 | Different rhythms in each hand (exercises A and B) | 15 minutes |
| 3 | Chord accompaniment and a simple melody over G – Em – C – D | 15 to 20 minutes |
| 4 | One song you love, in two parts: verse and chorus, at a slow tempo | 20 minutes |
At the end of the month, record yourself on your phone. The difference between week one and week four is audible, and it is a great reason to keep going.
What if I also want to sing?
Singing while playing piano is the same skill, one level up. Hand coordination is the foundation: once the accompaniment is automatic, your voice gets the attention. If you want to combine the two, vocal lessons help you hear how the accompaniment supports the singing.
Frequently asked questions
How long does it take to develop hand independence?
Most students feel a first improvement after two weeks of short daily practice, and comfortable control of simple songs after a few months. It varies from person to person, and no timeline is guaranteed.
Can adults learn hand coordination?
Yes. The brain keeps learning at any age, and adults often practice in a more organized way. You simply start slowly and patiently.
Do I need a real piano, or is a keyboard enough?
To begin, a full-size keyboard with touch sensitivity is enough. As you progress, a digital piano with weighted keys gives a feel closer to an acoustic piano.
What do I do when one hand “bleeds” into the other?
Go back one step: each hand alone, then a very slow tempo. Almost always the tempo is too fast, not the hands.
Where can I learn piano in North Tel Aviv?
Our music school is in Ramat Aviv Gimel, a short drive from Neve Avivim, Afeka and Green Ramat Aviv. You can read more about the music school in Ramat Aviv Gimel. Lessons at the student’s home (Rockstar Home) are also possible in nearby neighborhoods, subject to teacher availability.
Read also: Major Scales and Keys Explained
Piano lessons · All lessons · Contact us · Book a free intro lesson